How to Create Your First Quote
Last updated: Feb 2026
Estimated time to complete: 5 min.
Applies to: Air Conditioning Engineers
Summary
A step-by-step walkthrough of creating a professional air conditioning quote, from property details to PDF download.
Creating your first quote is quick and straightforward. This guide walks you through every step so you can generate a professional, branded quote for your customer in just a few minutes.
What You’ll learn
- How to enter job and customer details to create a air conditioning quote
- How to select systems, services, and options for accurate pricing
- How to generate, review, and share a professional quote with customers
Note
You can also start a new quote from the All Quotes page by clicking the "+ New Quote" button in the top right.
Step-by-Step Guide
Step 1. Navigate to the Quote Form
From the Dashboard, click the "New Quote" button or select "Create Quote" from the sidebar menu. This opens the multi-step quote builder.
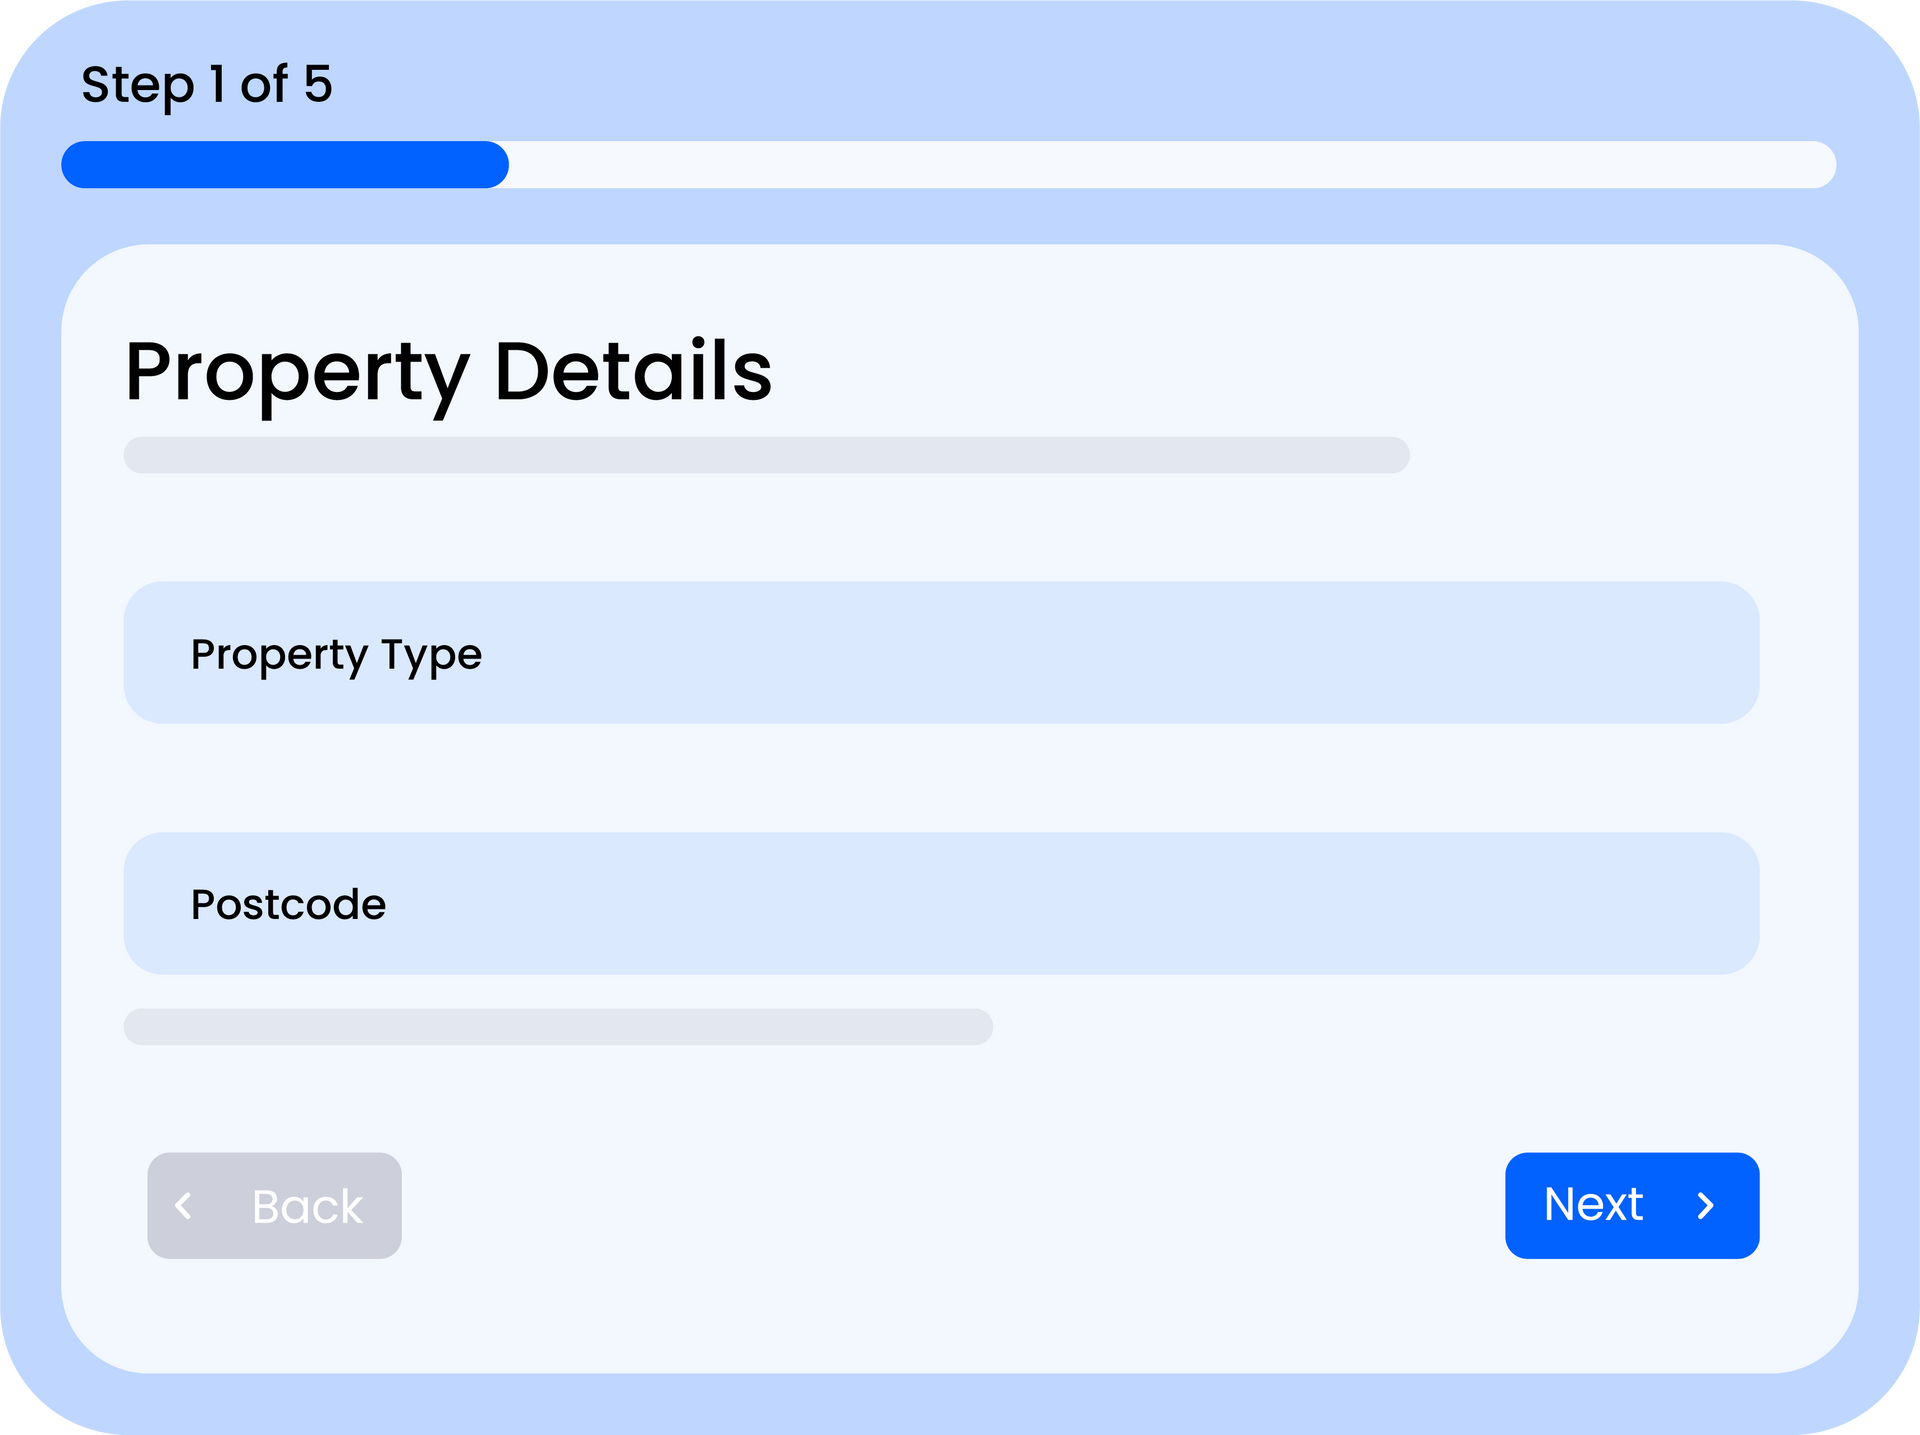
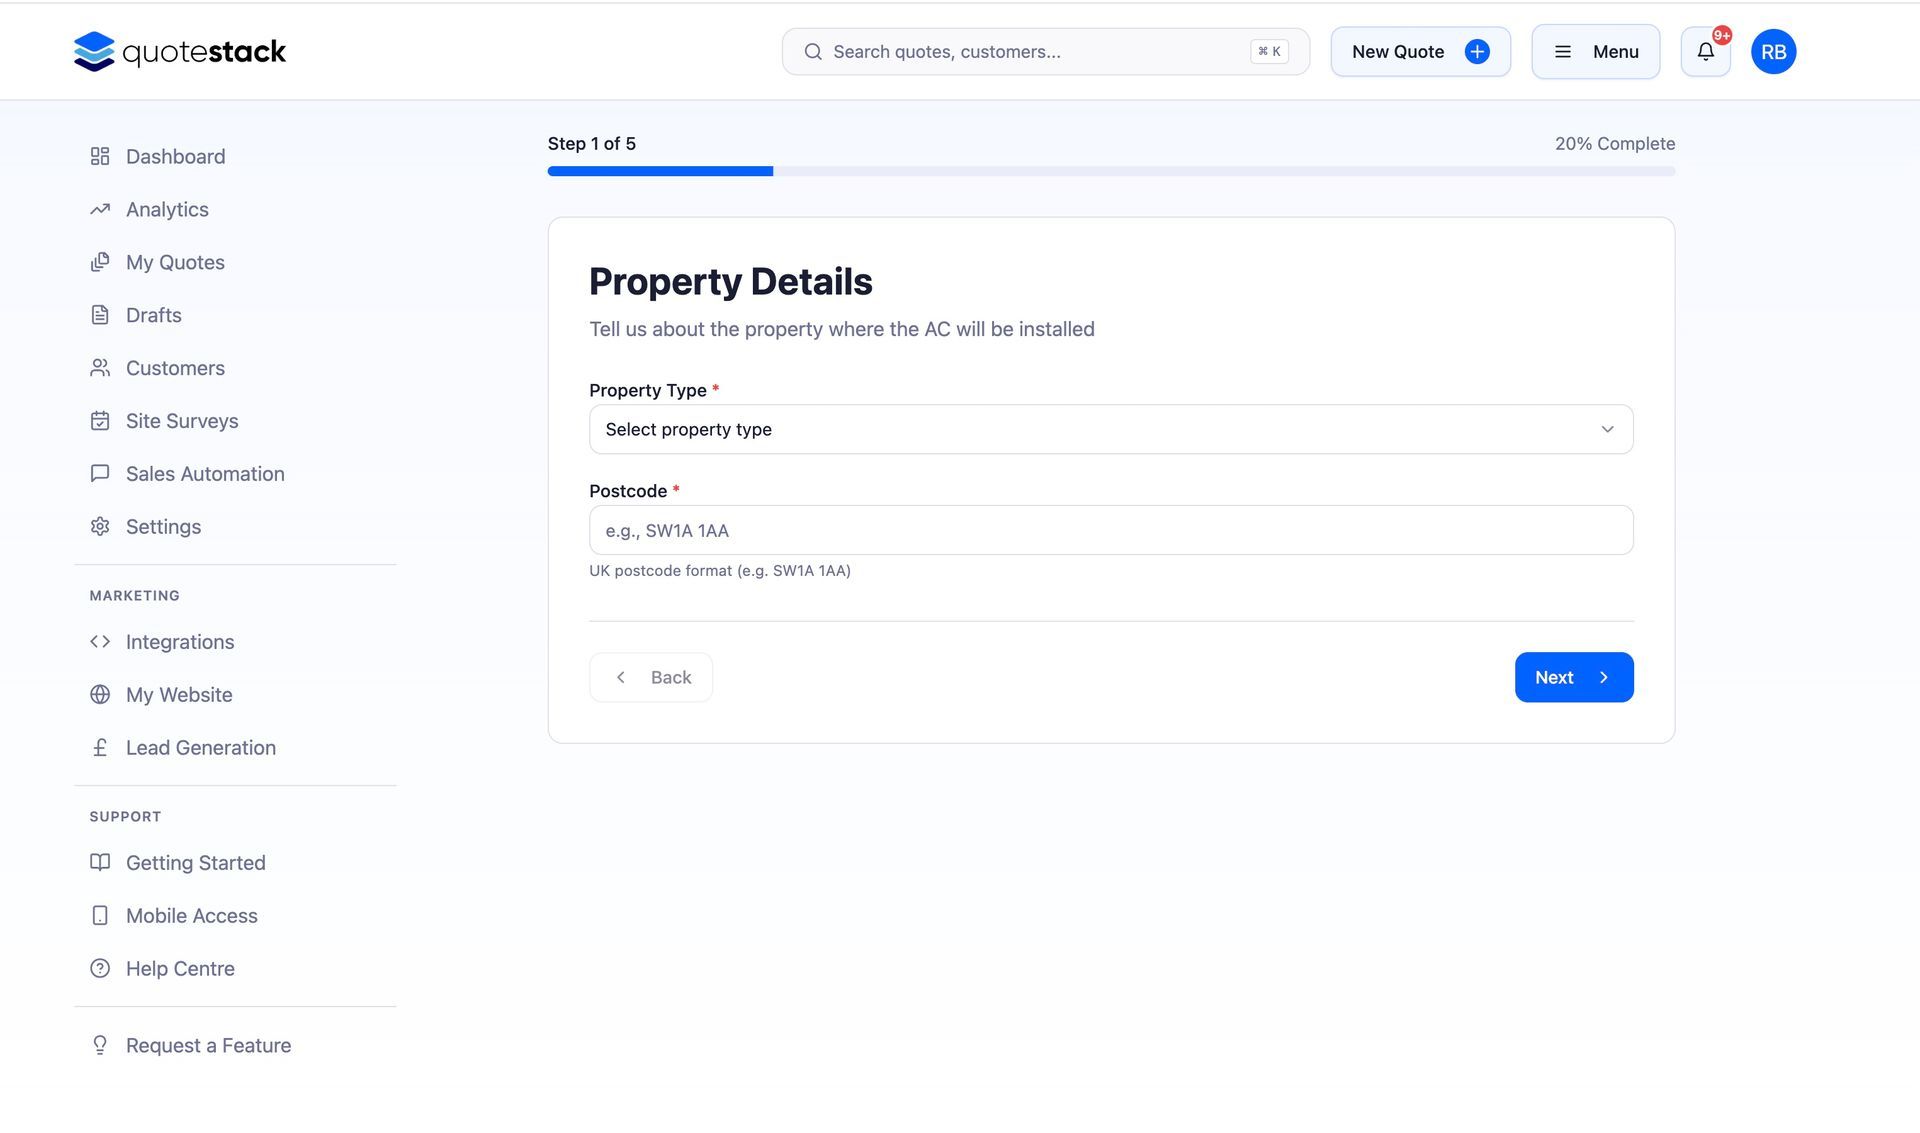
Step 2. Enter Property Details
Select the property type (e.g. Detached House, Flat, Office) and enter the property postcode. The postcode is used for site survey scheduling and location mapping later.
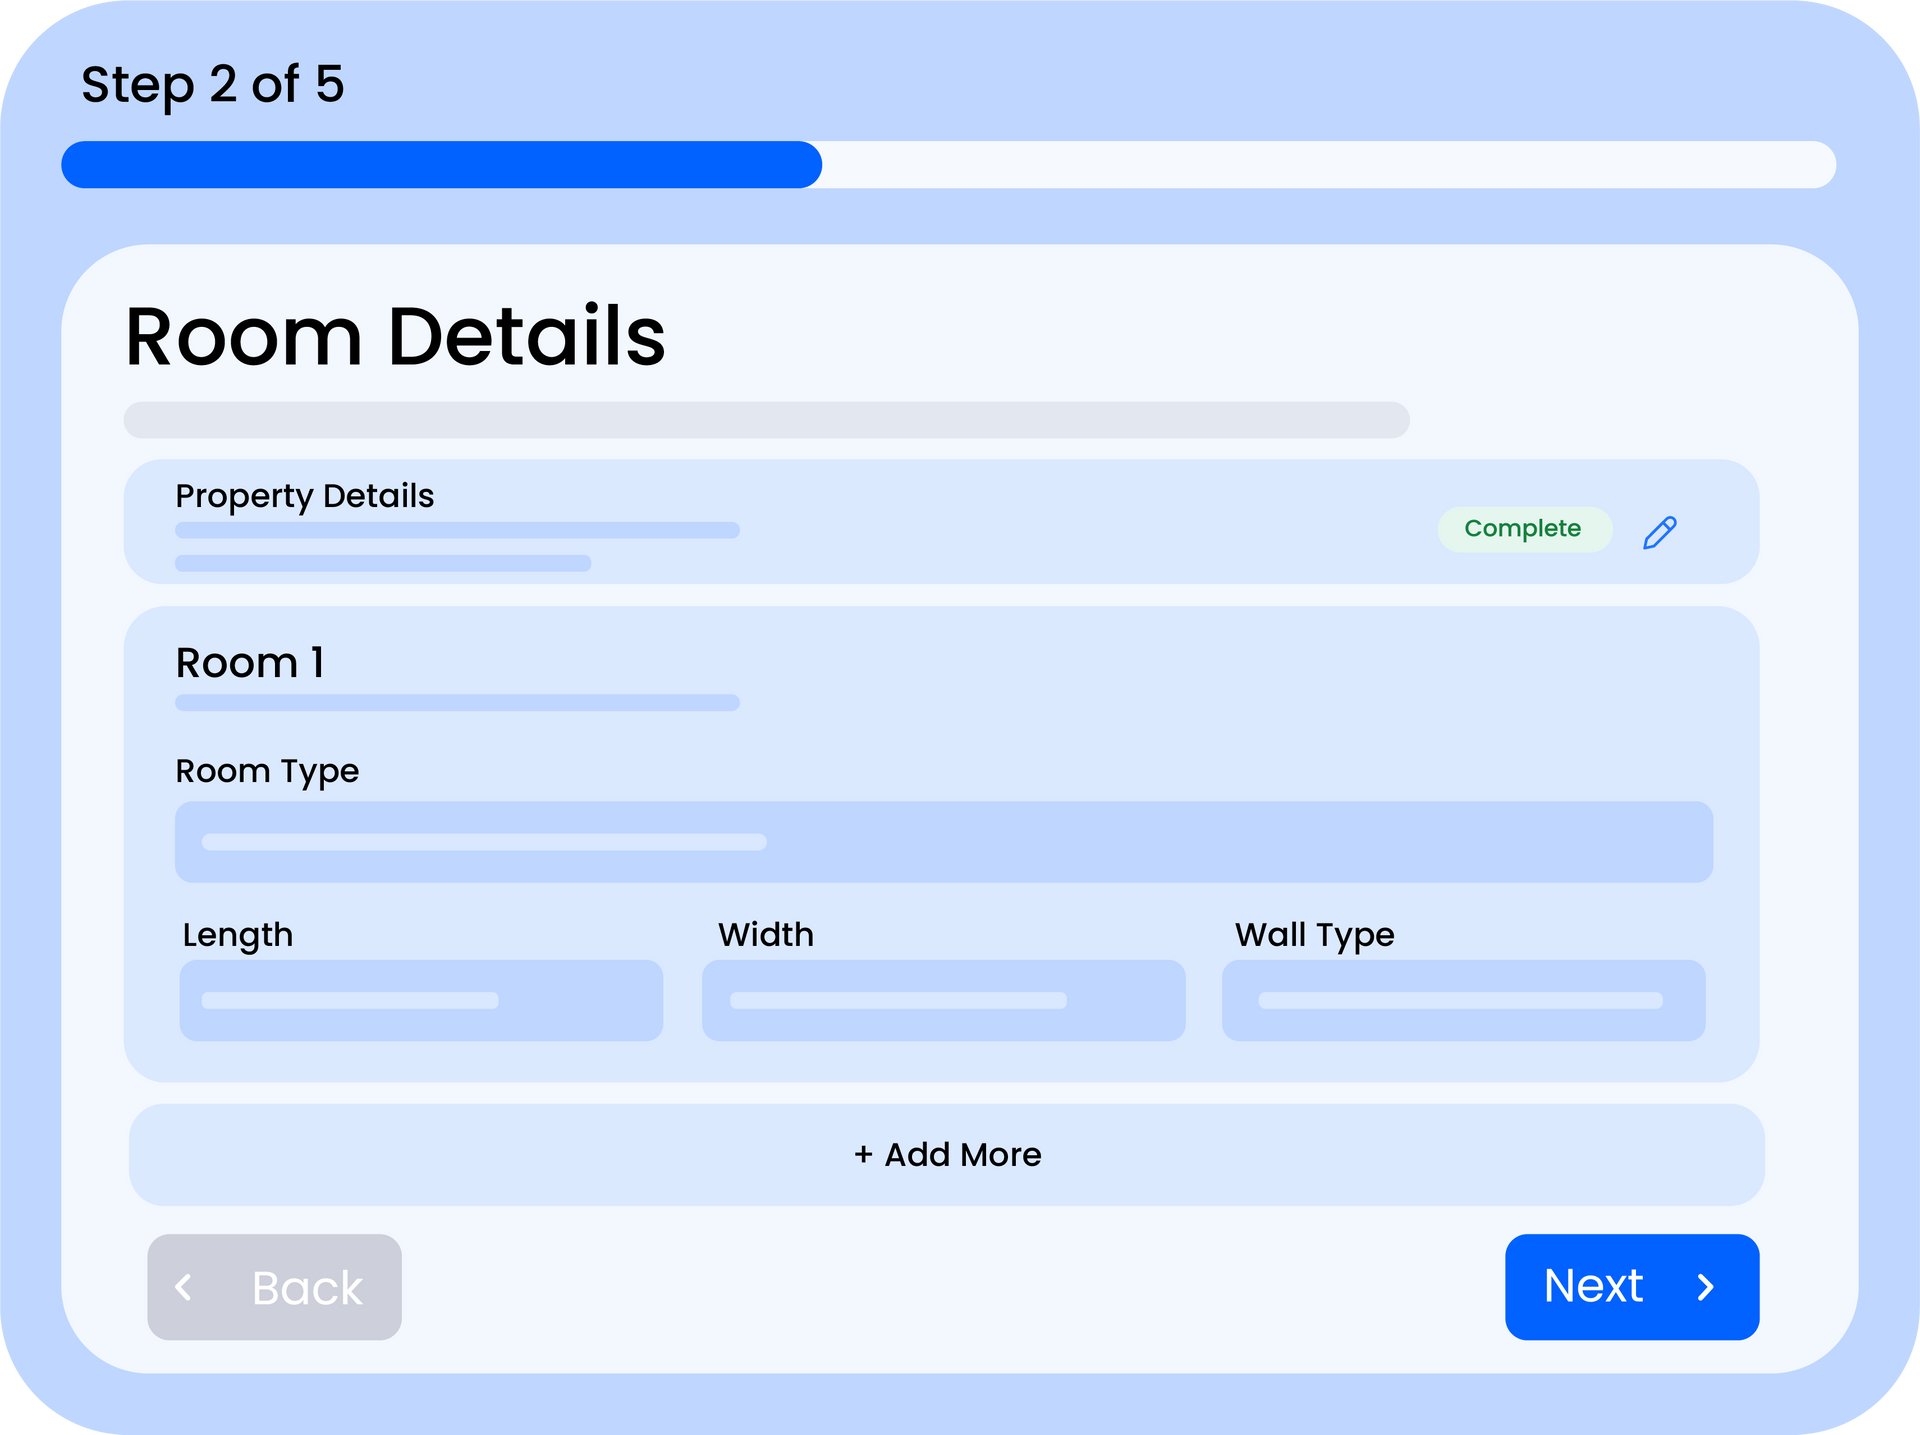
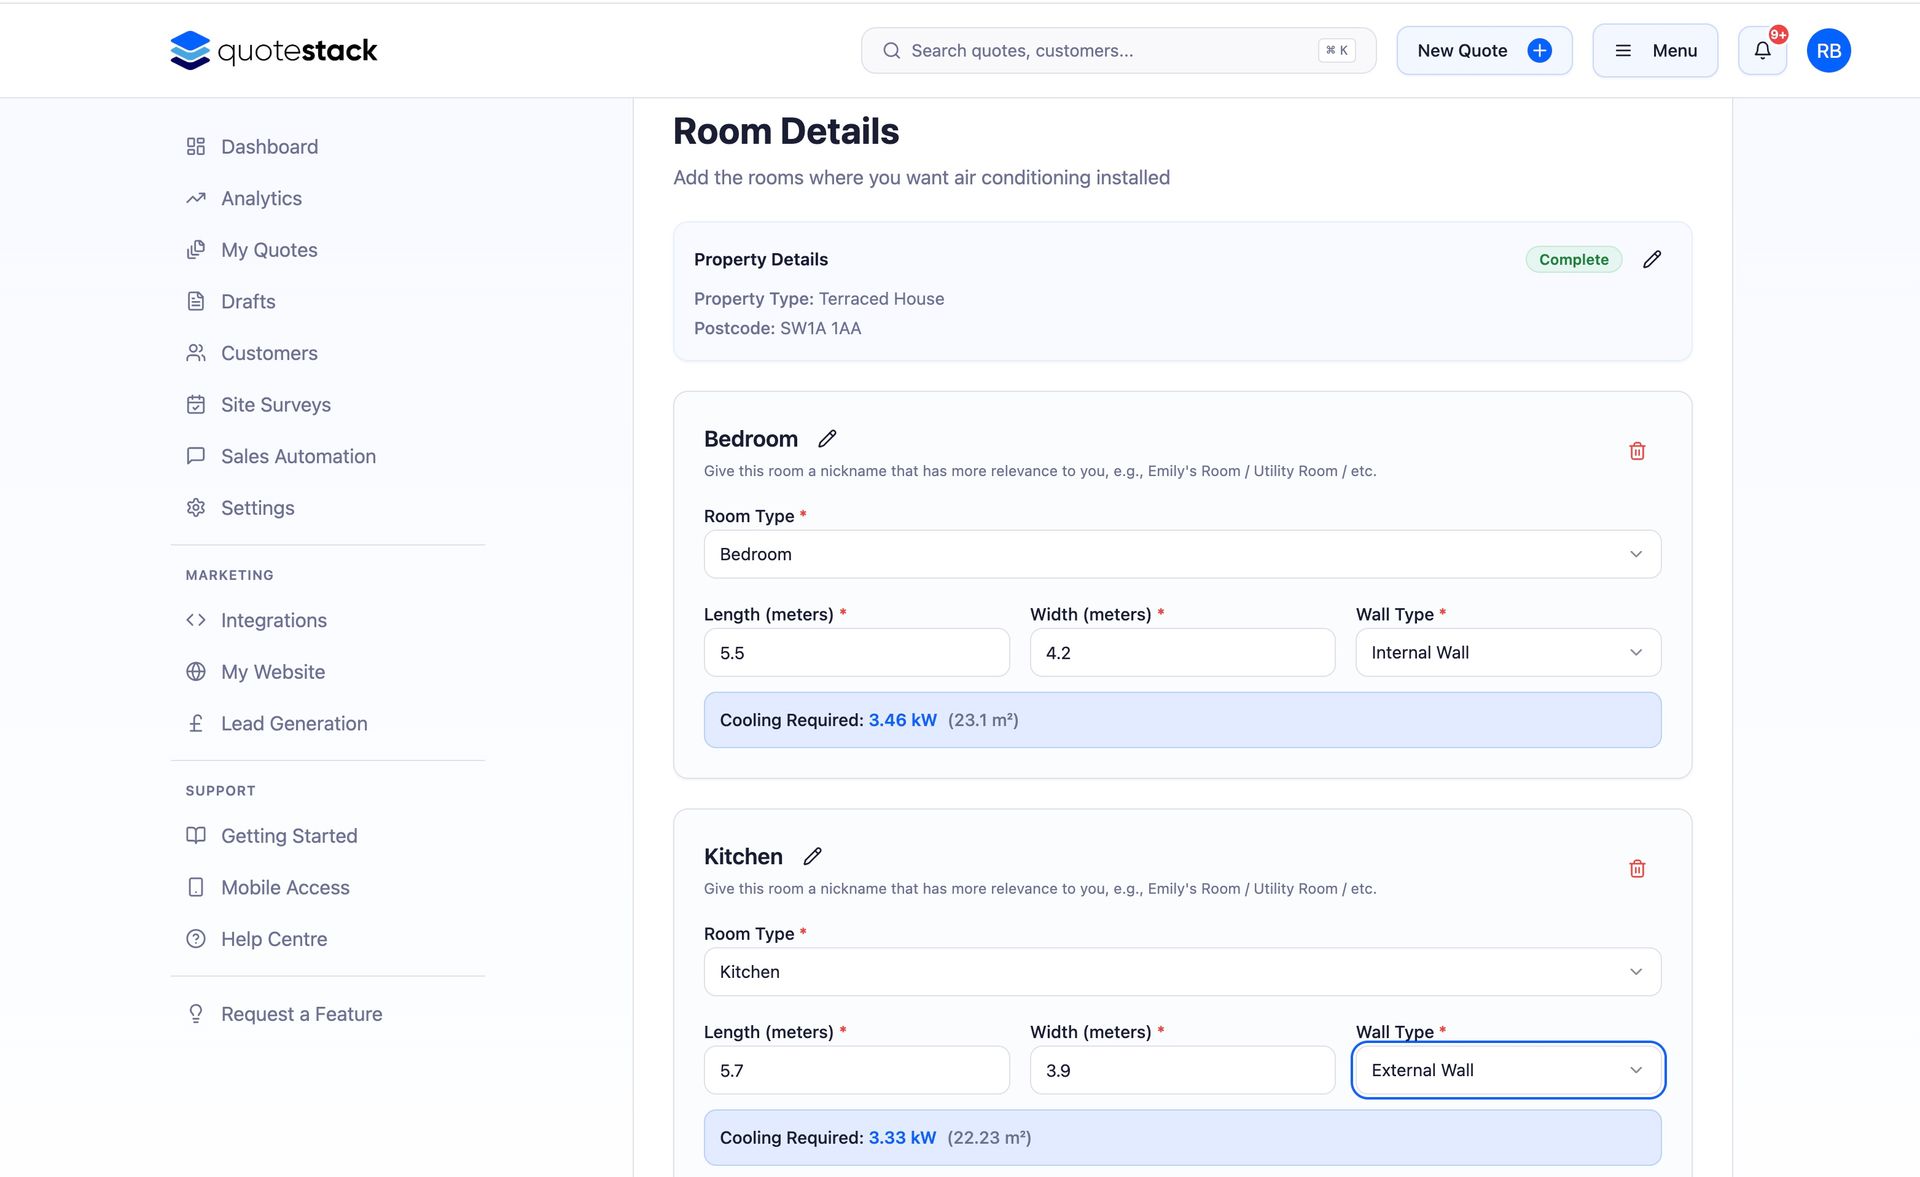
Step 3. Add Rooms
Click "Add Room" to define each space that needs air conditioning. For each room, choose the room type (e.g. Bedroom, Living Room, Server Room), enter the room dimensions (length × width × height in metres), and select the wall location for the indoor unit.
Note
You can add as many rooms as needed. The system calculates the required cooling capacity for each room based on its dimensions and type.
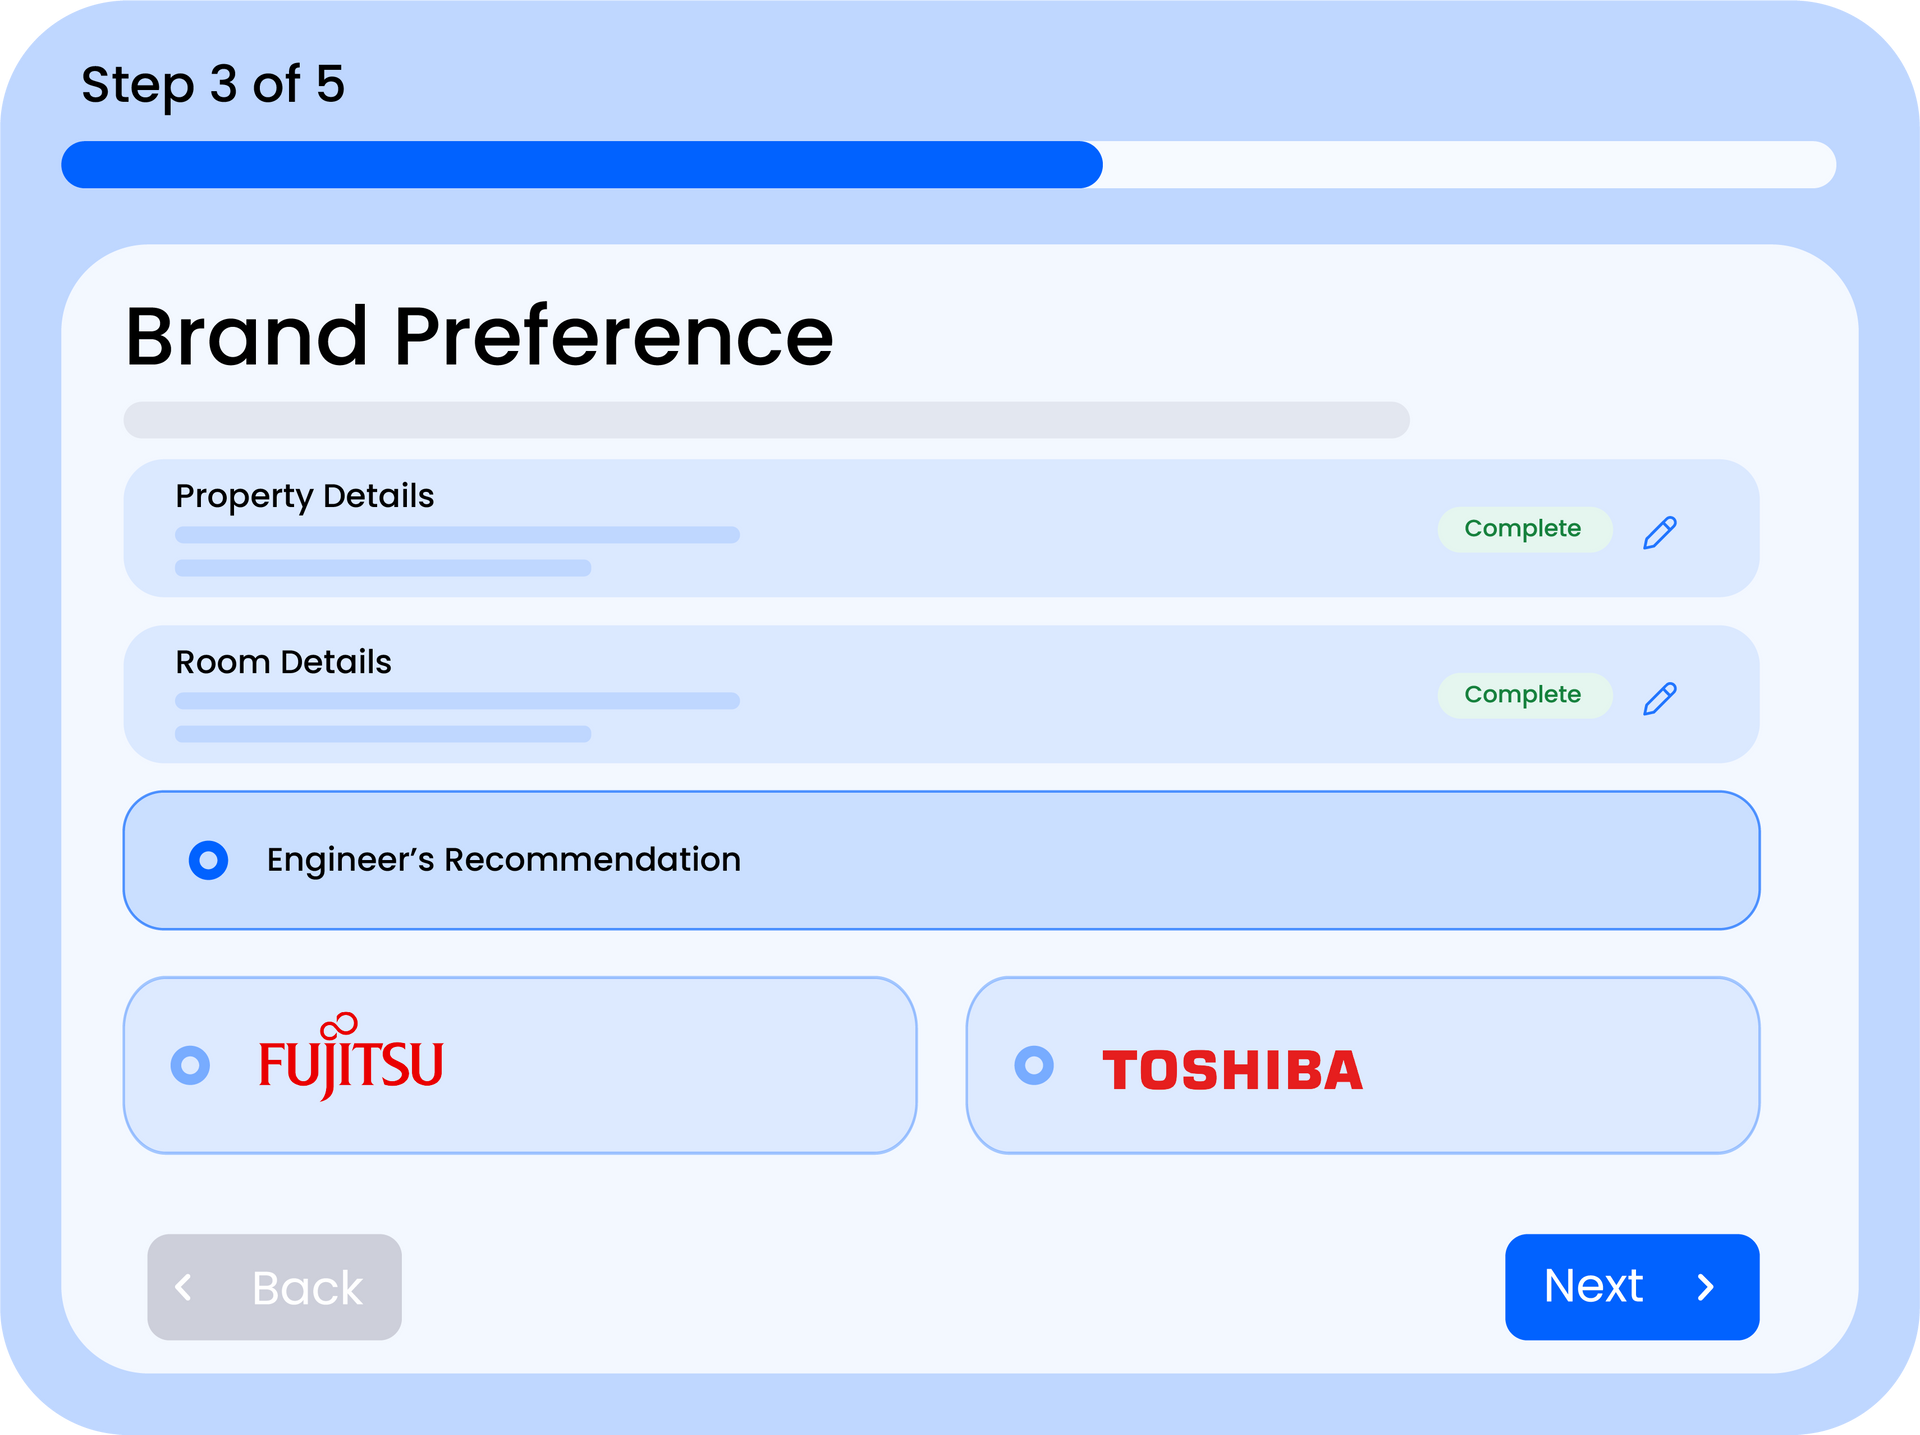
Step 4. Select Brand Preference (optional)
If your customer has a brand preference, select it from the dropdown. You can choose from any brands you've set up in your Equipment Catalogue. Leave this blank to let the system select the best-fit equipment across all available brands.
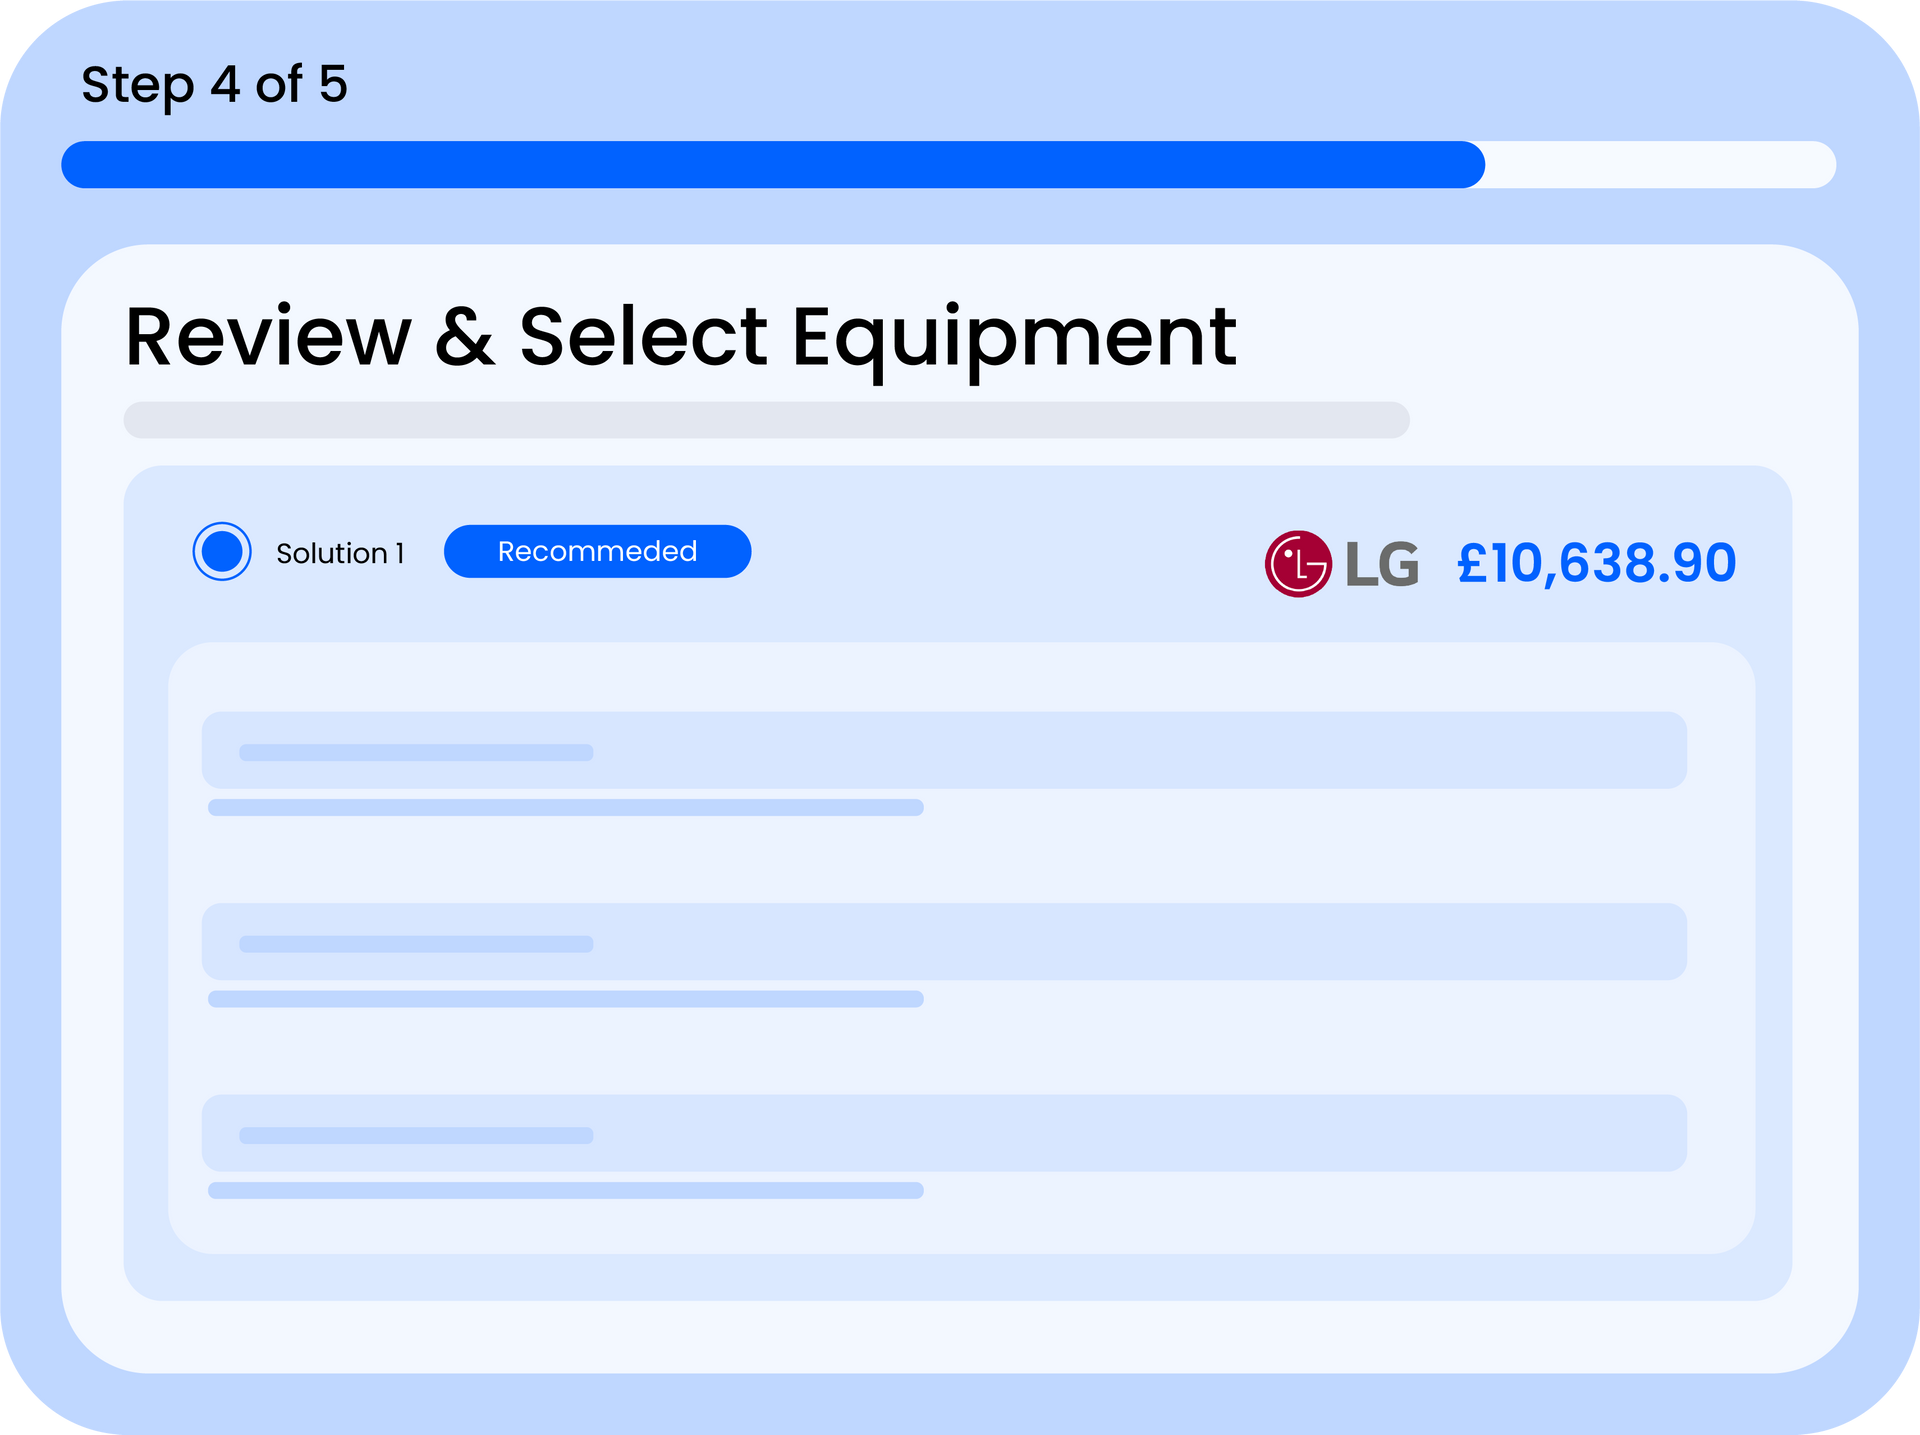
Step 5. Review the Equipment Selection
The system automatically selects the best combination of indoor and outdoor units based on the room requirements, brand preference, and your pricing settings. Review the suggested equipment, costs, and total price. You can adjust quantities or swap units if needed.
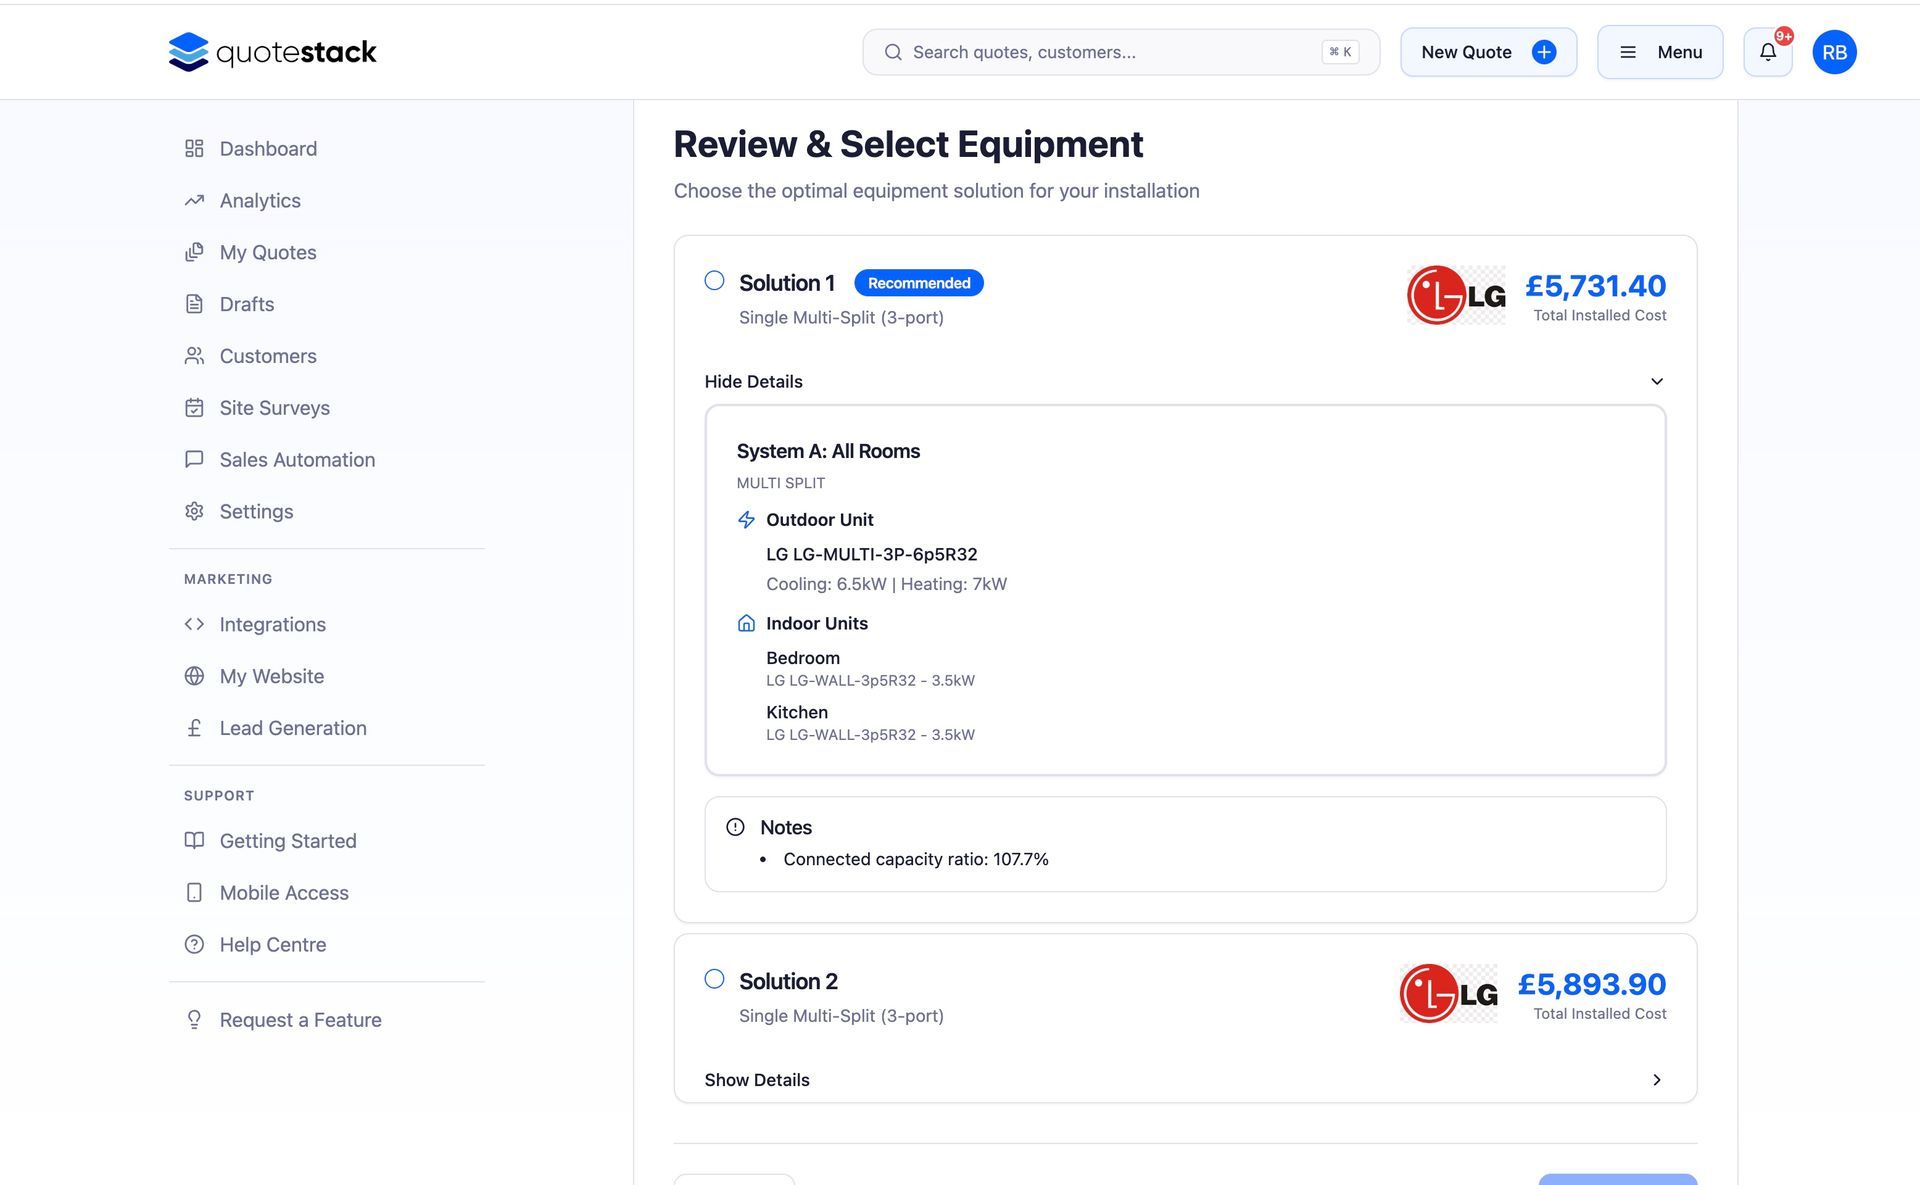
Warning
Make sure your Equipment Catalogue and Pricing Settings are configured before creating quotes — otherwise the system won't be able to generate an accurate equipment selection or cost breakdown.
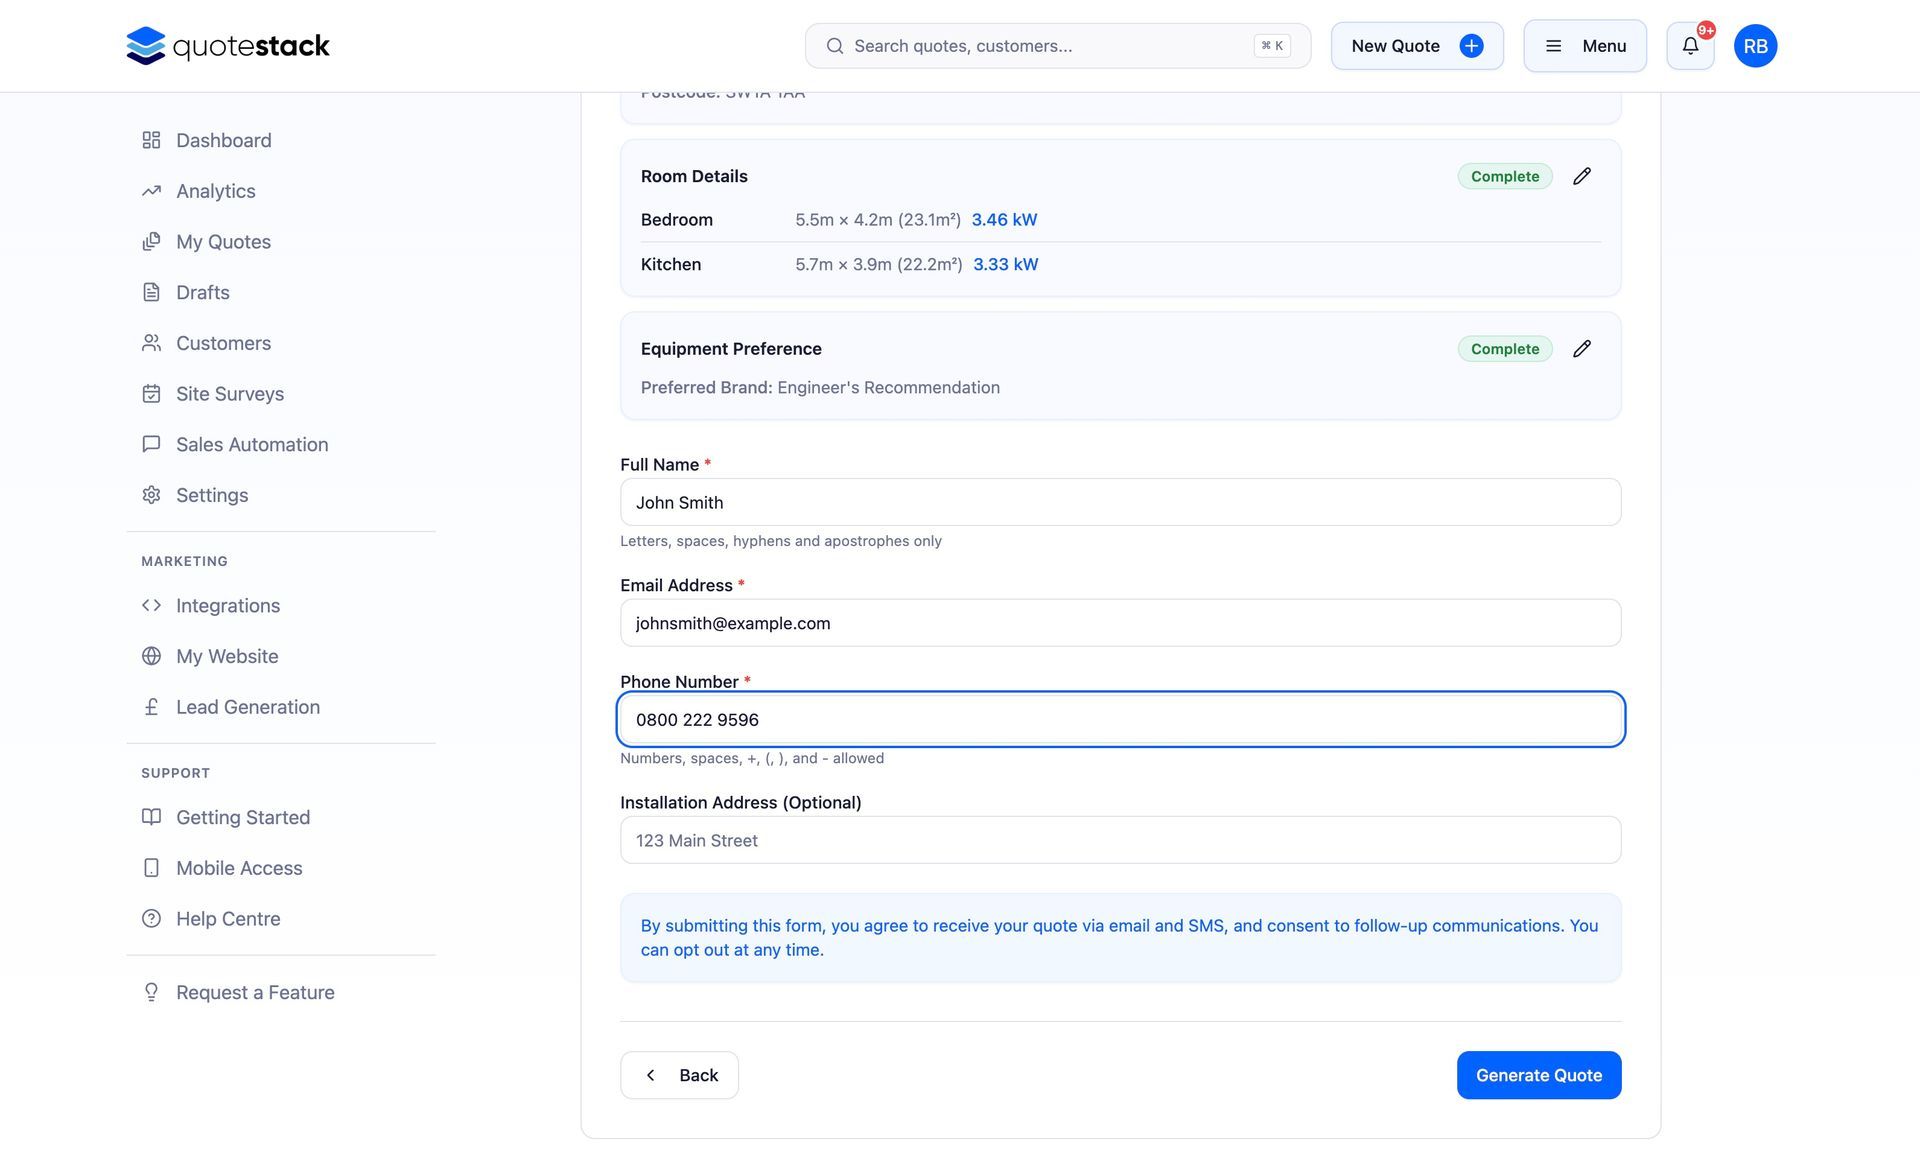
Step 6. Enter Customer Contact Information
Fill in the customer's name, email address, phone number, and property address. The email address is required — it's used to send the quote and any follow-up communications.
Step 7. Review and Submit
On the final review screen, check all the details: property info, rooms, equipment, pricing, and customer contact. When everything looks good, click "Submit Quote" to save it
Step 8. View the Quote Summary and Download PDF
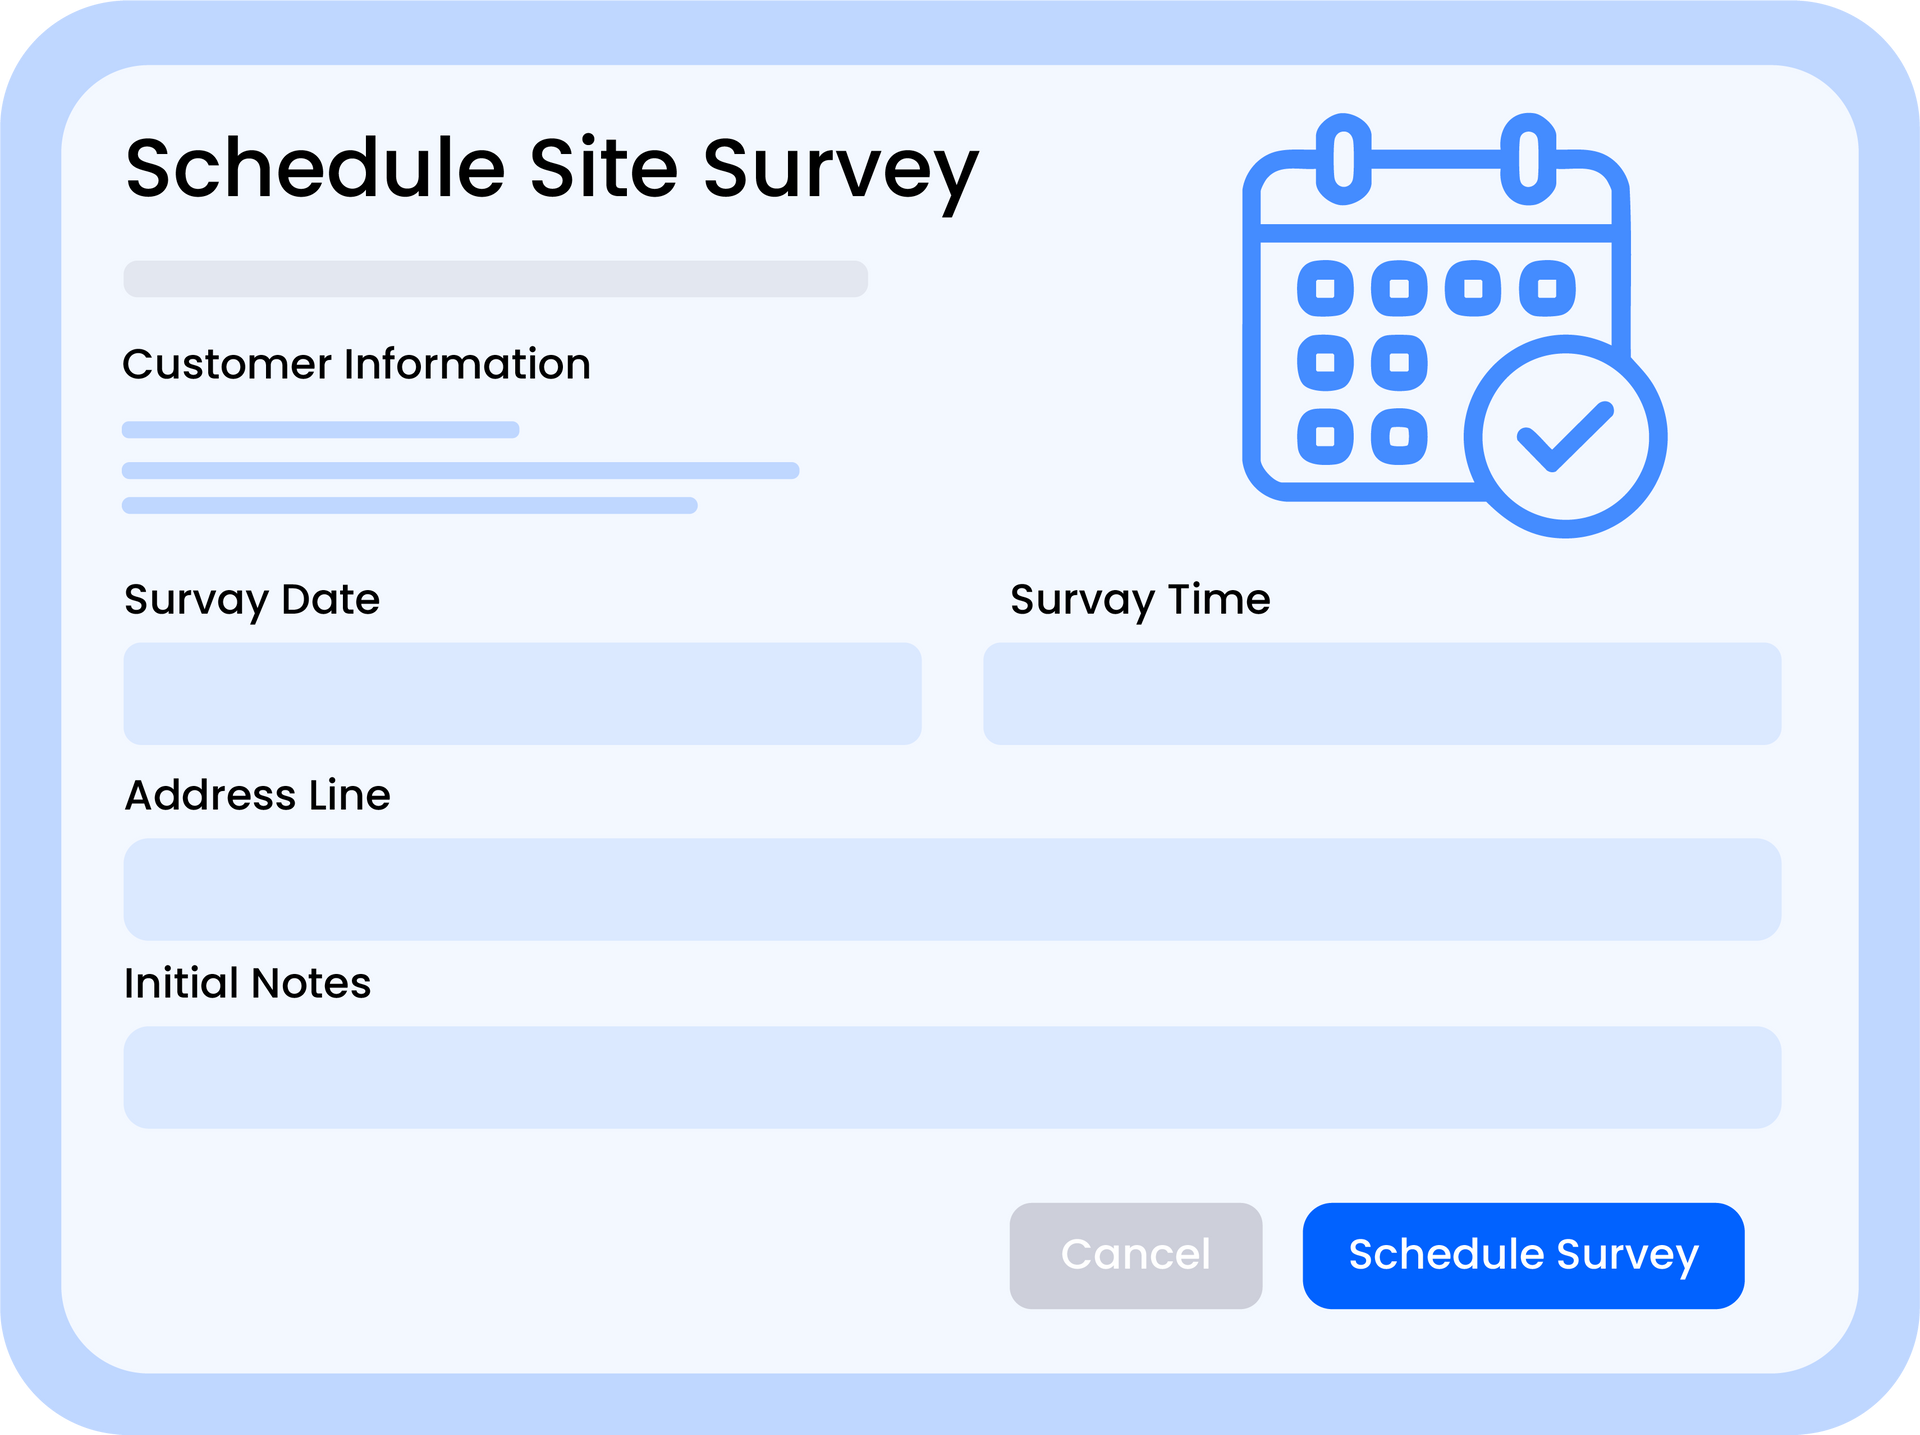
After submitting, you'll be taken to the Quote Summary page. Here you can view the full breakdown, download a branded PDF, email the quote to the customer, or schedule a site survey
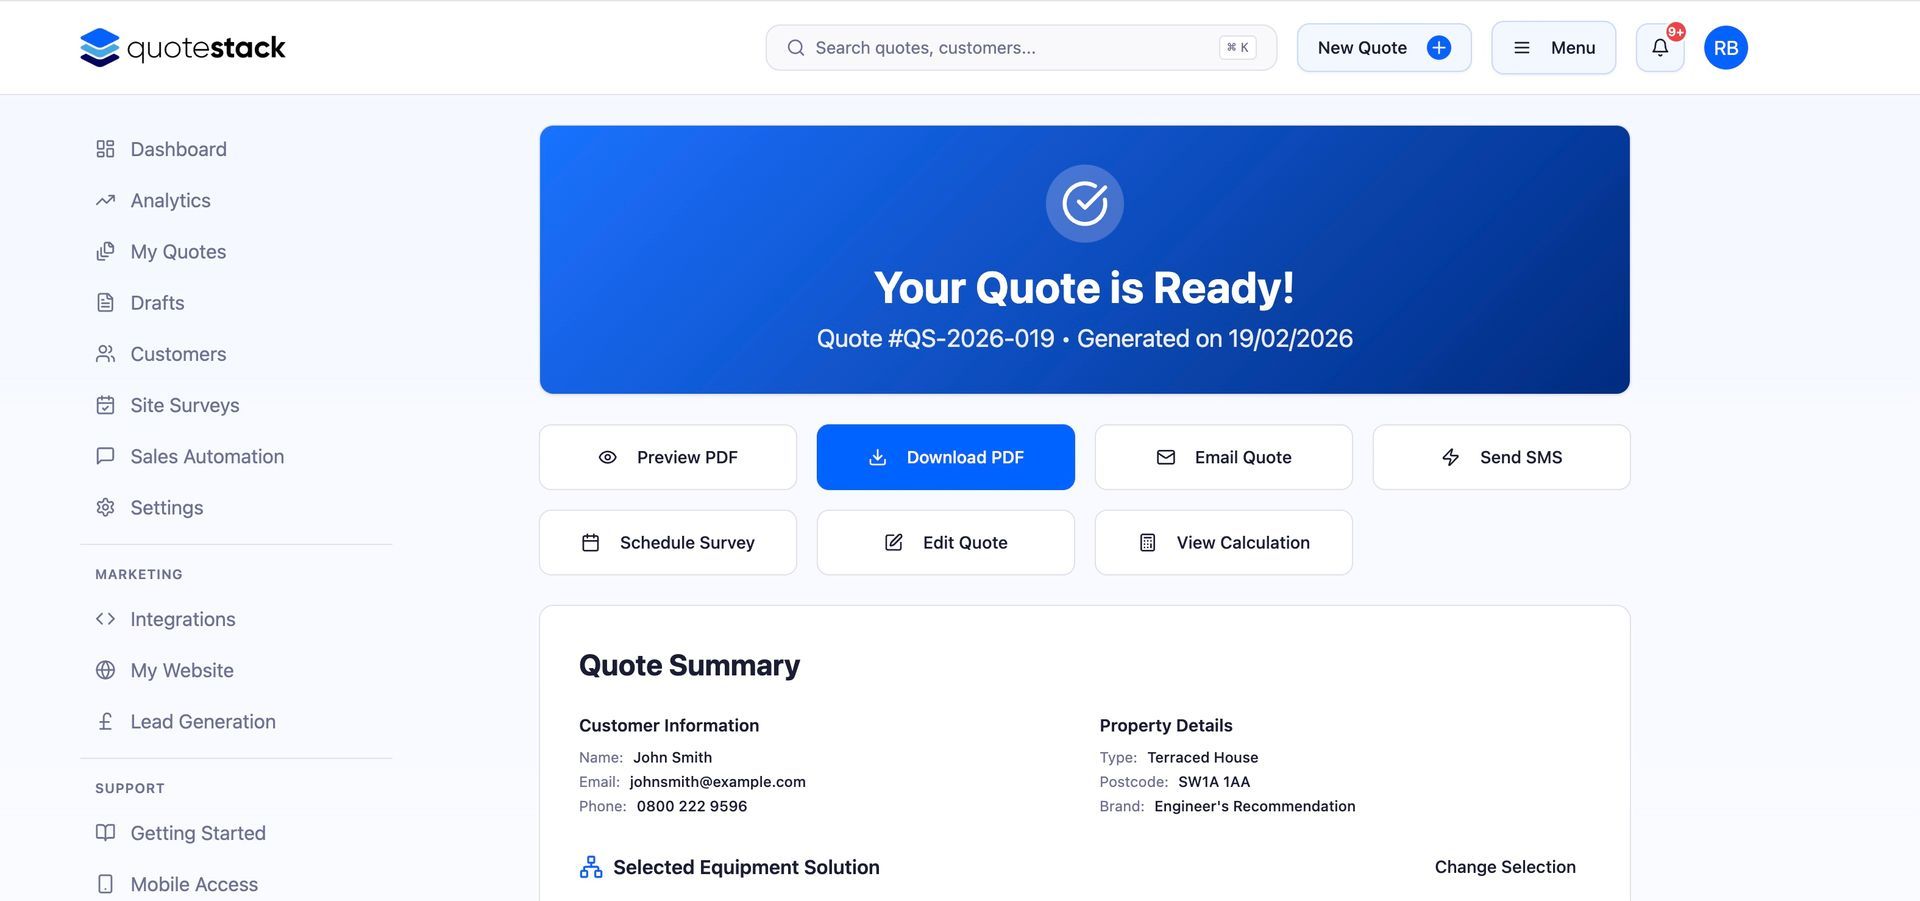
That's it! Your quote is now saved and ready to share. You can track its status from the All Quotes page or the Dashboard pipeline view.
Did this answer your question?
😃
😐
😞
Great! We’re glad we could help.
Not quite what you needed? Discover more articles here
If you'd like you can ask our team